Using buttons to get input
Now you're able to control an output component (an LED), let's connect and control an input component: a button.
-
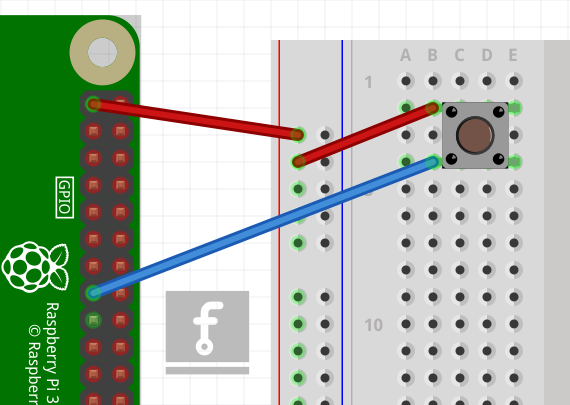
Connect a button to another GND pin and GPIO pin 22, like this:
- This time you'll need the
Buttoncomponent, and to tell it that the button is on pin 22. Edit theexamples/button.rsfile and write the following code in your new file:
extern crate rust_gpiozero;
use rust_gpiozero::*;

fn main() {
    // Create a button which is attached to Pin 22
    let button = Button::new(22);
}
- Now you can get your program to do something when the button is pushed. Add these lines:
# #![allow(unused_variables)]
#fn main() {
button.wait_for_press();
println!("button pressed");
#}
- The code should look like this:
extern crate rust_gpiozero;
use rust_gpiozero::*;

fn main() {
    // Create a button which is attached to Pin 22
    let button = Button::new(22);

    // Wait for button to be pressed
    button.wait_for_press();

    // Message to display when button is pressed
    println!("button pressed");
}
- Save the file and run the code with:
cargo run --example button
- Press the button and your text will appear.