When it comes to starting a DIY Electronics project, one can be overwhelmed by the myriad of choices. With so many varieties out there, how to get started?
The basic components include: Processing, Input/Output, Circuits and Wiring and Power.
Processing: the brain of the project, typically development boards which enable us to run our program logic.
Inputs/Outputs: sensors, actuators, and other gadgets we connect to our boards to enhance our projects.
Other Electronic Components: like resistors, capacitors, diodes and transistors essential for proper functioning of our circuit.
Wiring and Power: Connect things together and power of course to make everything functional.
Finding the right board
The Maker’s Guide to Boards is a good starting point for comparing different boards based on price, software compatibility, usage recommendations and other options.
Basically, one must choose from a single-board microcontrollers such as Arduino boards or more powerful single-board computers such as the Raspberry Pi or BeagleBone.
Arduino boards
Arduino is open-source hardware. These microcontrollers are used to build digital devices and interactive objects that can sense and control objects in the physical world. There are a lot of different Arduino boards out there. All Arduino boards have one thing in common: they are programmed through the Arduino IDE. This is the software that allows you to write and upload code.
Arduino boards are suitable for single-purpose projects such as monitoring your doorbell, making a smart garden, or home automation. Being relatively cheap, you can use them permanently in projects without breaking the bank.

Arduino-compatible boards are very popular. These boards can be programmed via the Arduino IDE. ESP8266-based such as the NodeMCU, Huzzah, Wemos are definitely the boards to get if you want a cheap wifi-enabled board. They are available for 5 -10 dollars on Aliexpress!

Single Board Computers
These are usually tiny computers running linux from an SD card and providing Input/Output ports to interface with the physical world. Compared to arduino boards, they also provide an HDMI or composite output to hook up a display. As such, they are suitable for complex, multimedia or linux based projects.
The Raspberry Pi is the most popular single board computer. All models feature a Broadcom system on a chip (SoC), which includes an ARM compatible central processing unit (CPU) and an on-chip graphics processing unit (GPU). The Raspberry Pi can run Raspbian, a Debian-based Linux operating system and other third party operating systems such as Ubuntu MATE, Snappy Ubuntu Core, Windows 10 IoT Core, RISC OS and even Kodi media centers.

The latest Raspberry Pi Zero and Raspberry Pi Zero W, available for $5 and $10 respectively, are without a doubt the boards to buy if possible. They can be used for interfacing with the physical world themselves or can be used as a hub in more complex projects, whereby other microcontrollers connect to them.
The Tessel 2 ($44.45) is a development board with on-board WiFi capabilities that allows you to build scripts in Node.js. The Tessel provides you with a connected hardware prototyping system that can be used in multiple different applications. The Johnny-Five Inventor’s Kit, from Bocoup and SparkFun, includes a Tessel 2, and everything else you need to do 14 experiments!
Any board compatible with the Johnny-five framework is good to get started with nodebots. Please refer to the platform support for Johnny-five.
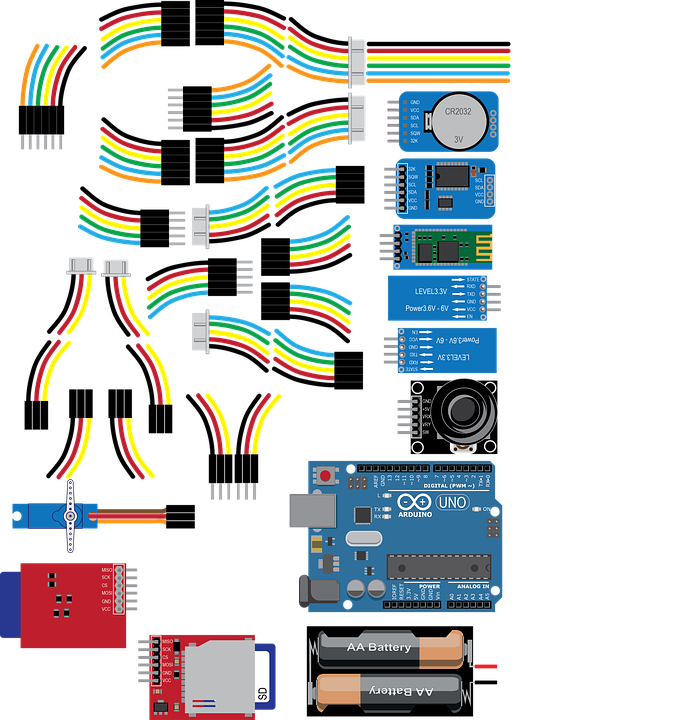
Parts
Once you have decided on the board, you need to get some input and output components to interface with the physical world. Again, there are so many components.
The best way to get started is to buy a beginner’s kit such as Sparkfun’s collection of kits. The essentials are:
Breadboard: A breadboard is a solderless device for temporary prototype with electronics and test circuit designs. Most electronic components in electronic circuits can be interconnected by inserting their leads or terminals into the holes and then making connections through wires where appropriate.
Inputs: Sensors are electrical components that function as input devices. However, not all inputs are sensors. Inputs allow your board to be aware of changes in its environment and also to respond to user inputs. For example, a photoresistor can be used to measure light intensity in the surroundings.
Outputs: Outputs help convey a project’s functionality to the outside world. They can include light through LEDs, sound through buzzers, movement through servos and motors, etc.
Wiring: Jumper wires(DuPont wire) are helpful to connect everything together. Get different ones- male-to-male, female-to-female and male-to-female.
A 5V, 1A power plug or charger with a USB cable for powering projects when prototyping. Afterwards you can include batteries in your projects.
A shopping list
Most common components based on different starter kits such as the Arduino Starter Kit, Sparkfun’s Inventor’s Kit and the Johnny-Five Inventor’s Kit.
- A development board
- Breadboard
- Basic 16x2 Character LCD
- Motor Driver and at least two DC motors
- Photoresistor
- Temperature and Humidity sensor
- Water sensor
- Potentiometer
- Piezo buzzer
- A couple of diodes
- A servo
- Push button
- Relays capable of switching 240V AC
- RGB LEDs
- 5mm LEDs - different colours
- 100, 330 and 10K Resistors
- NPN transistors
- Jumper wires
Cool to have:
- Accelerometer
- More servos
- Ultrasonic distance sensor
- Shift Register
All of these parts are available for cheap on Aliexpress! Pro Tip: add the “breakout” or “module” in your search queries. These components will be breadboard friendly, sometimes already including resistors or capacitors. Just plug & play!
DM Electronics also has most of these components.
References
Want to get updates on these blog posts?
Enjoyed this post?